Adjust color, contrast, and opacity
After loading a dataset, select its Volume object and open the Shading workspace. Each loaded volume channel has its own branch in the shared material.
Choose a useful preview
Microscopy volumes are visible in Material Preview and Rendered mode.
- Material Preview is usually the faster interactive view and normally uses EEVEE.
- Rendered Preview shows the selected scene render engine. Cycles is slower but handles dense scattering more accurately.
Work on one channel at a time
In the modifier of the relevant Volume, Surface, or Label Mask object, temporarily disable the other channels. Channel inclusion controls are available on all three data-object types. This makes the effect of every control easier to understand and can reduce memory use.
Set intensity limits
Select the data object in the Outliner, open the Shading workspace, and make sure its Microscopy Nodes material is shown in the Shader Editor. Find the frame for the channel you want to edit. The intensity controls are directly below its histogram.
There are two intensity ramps: the upper Color Contrast Limits ramp sets the range passed into the color map, while the lower Alpha Limits ramp independently sets which intensities contribute to transparency. Select a ramp handle and edit its position to change that limit. Keeping separate ranges lets you increase color contrast without making the same values disappear.
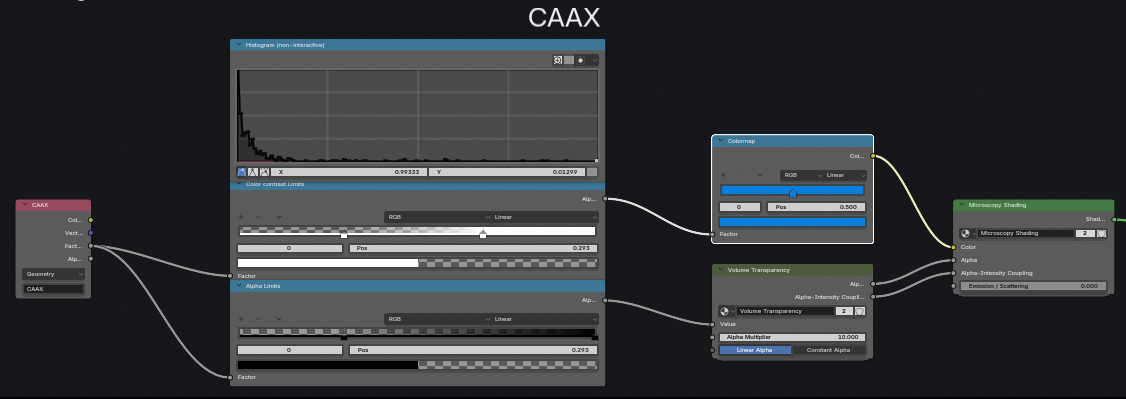
- Move the minimum to suppress background.
- Move the maximum to focus the color map on the informative signal.
- Use separate color and alpha ranges when color contrast and visibility need different limits.
This is analogous to adjusting display limits in microscopy software; the source voxels are not changed.
Choose a color map
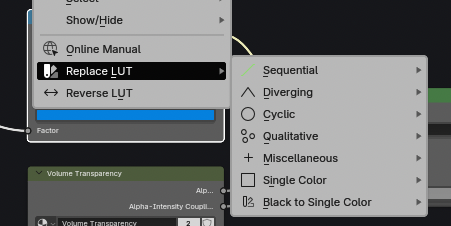
The Color LUT maps the normalized intensity to color. To replace it, right-click the Color LUT ramp and choose Replace LUT, then select a color-map family and map from the menu. You can also edit the ramp handles directly when you want a custom map.
Control transparency or density
The alpha controls determine how strongly each voxel contributes:
- Linear alpha makes brighter voxels contribute more strongly.
- Constant alpha gives all values inside the selected limits the same contribution.
- The alpha multiplier controls brightness for emission and density for scattering.
See the Volume shading reference for every input.
Emission versus scattering
Emission makes the channel produce light. This is often effective for sparse fluorescence and does not require scene lighting.
Scattering makes the data interact with light. It is often useful for dense EM volumes and internal structures, but requires a non-black world or added lights. Cycles usually gives the most accurate result.
Tip
These are starting points, not modality rules. Dense fluorescence can look good with scattering, and EM data can use emission when that communicates the structure more clearly.